

Last summer slugs decimated the strawberry harvest from my garden. This year I was prepared. Or so I thought. I had a bag of diatomaceous earth stand by, and an old salt shaker to spread it around the plants. But there were no slugs. Instead, chipmunks discovered the strawberry patch and took a bite out of every single ripe strawberry.
In my desperation I spread a thick band of organic dried blood around the perimeter of the strawberry patch. It smelled so disgusting that I wanted to stay away but it did not deter the chipmunks at all. I could even see their tiny pawprints in the dried blood the next day. Then my husband came up with the idea of bird netting, secured with hooks in the ground. It was cumbersome to remove it before each picking but it worked. For about a week, we harvested more than seven pounds of beautiful strawberries every other day.
But then it rained, heavily and relentlessly, and with it came the gray mold, a fungal disease that turns even unripe strawberries into a fuzzy gray mass. That the strawberry plants were getting huge and the patch became one knee-high jungle of foliage from all the extra nitrogen in the dried blood made it worse. Due to lack of air circulation the disease spread even faster.
Well, I learned my lesson for next year. Thankfully I harvested enough strawberries to make different variations of strawberry jam and strawberry syrup. And that brings me to the other topic I want to write about: canning.
Gardening and canning, you live, and you learn. Constantly. I knew this for sure about gardening but this year, I feel that learned more about canning and food preservation than in all the years before.
For one, I joined the Facebook group Food in Jars that is a spin-off of Marisa McClellan’s blog, Food in Jars. It is a friendly, helpful community without any of the social media nastiness that usually makes me stay away from these groups.
Instead, you get lots of ideas, help for troubleshooting, and sometimes sobering answers. Following a thread about safely canning tomatoes, doubt crept up on me whether the way I had been canning tomato soup for the past few summers was up to the food safety standards of the National Center for Home Food Preservation which I generally follow. The tomato soup had somehow slipped. It had a roux base, which is a no-no because flour is too dense to be canned safely. The remaining quarts of soup in my pantry went down the drain. Better to be safe than sorry.
And secondly, I am participating in the monthly Food in Jars Mastery Challenge, a year-long affair with a different topic every month. I tried new things that I would not have tried otherwise, such as making yogurt which tastes much better than the store-bought stuff.

Also, in early June, I attended the first Food Preservation Retreat co-organized by Marisa. The eight hours were packed with tons of information and inspiration and it was nice to meet people with the same passion.
I had met Marisa a couple of times before that. A few years ago, she even tracked out to our rural outpost when she had a book signing in the area. I was a bit nervous prior to her visit – not so much about feeding her a soup from my cookbook and homemade pumpernickel bread but more about what she would think of my preserving skills. She was very complimentary about everything and even wrote about it on her blog.
I don’t have much time to read many blogs, and even if I did, a lot of what’s out there is so very self-important and filled with personal ramblings, or making followers salivate over a lifestyle that oftentimes is too pretty and picture-perfect to be of a real person.
Marisa is one of the bloggers I follow because everything she does and writes about is highly relatable and hands-on, and the message is always an empowering, “You can do this”. I have three of her four books, and they all fall into the same category.
For the Food in Jars challenge in June, the topic is jam, and I adapted Marisa’s strawberry jam with balsamic vinegar.
As the strawberry season is winding down, I just had enough strawberries this week for a cake. I made the Strawberry Custard Cake from this blog, but with a new, improved crust using lemon-infused olive oil.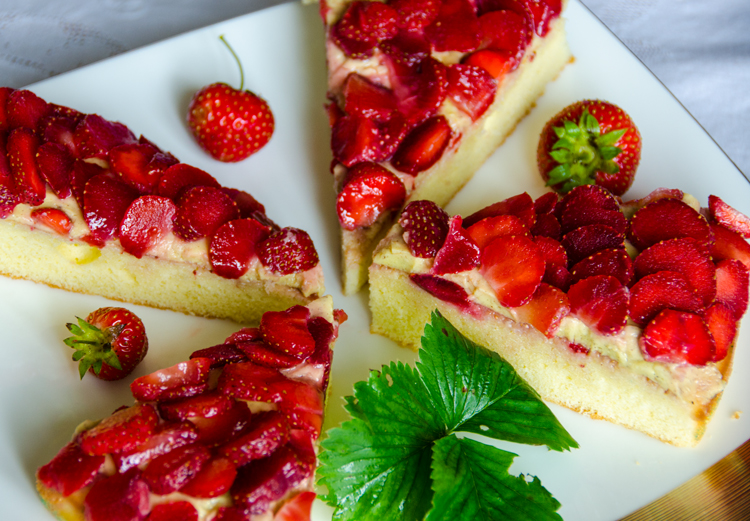
Strawberry Jam with Passionfruit Jalapeño White Balsamic Vinegar
Adapted from Food in Jars
I am, as I describe in more detail on my German food blog, Spoonfuls of Germany, a big fan of pectin as it lets me use less sugar, and I can cook the fruit for less than five minutes. The jam and jelly tastes fresher and has a more vibrant color.
Usually I reach for the pectin I bring back from Germany but since I am in learning and exploration mode, I tried Pomona’s Universal Pectin for the first time. It allows you to use as little sugar as you like. I cut down on the sugar in Marisa’s recipe and added less calcium water and pectin than the package directions call for, as the first batch I made was much too stiff.
1½ pounds strawberries, washed, hulled and chopped (about 4 cups chopped)
¾ cup + 2 tablespoons (6 ounces/170 g) sugar
1 teaspoon calcium water (made from Pomona’s Universal Pectin)
1 teaspoon Pomona’s Universal Pectin
2 tablespoons passionfruit jalapeño white balsamic vinegar
1/4 teaspoon freshly ground black pepper
1. Prepare a boiling water bath canner and three half-pint jars. Place a small plate in the freezer.
2. Place chopped berries in a large non-reactive saucepan. Add calcium water and stir well.
3. In a bowl mix sugar and pectin.
4. Bring the berries to a full boil and remove any foam that is forming at the surface. Slowly add the sugar-pectin mixture while stirring constantly and vigorously. Cook for 1 minute.
5. Take the plate out of the freezer and drizzle about 1 teaspoon of the mixture on the plate. Tilt the plate back and forth. If the jam starts to set, it is ready. If it remains runny, cook for 1 more minute. Don’t forget to stir the jam a few times while you are testing the jam.
6. Remove the pan from the heat and stir in the balsamic vinegar and the pepper.
7. Pour the piping hot jam into the prepared jars. Wipe the rims with a damp paper towel and close them with lids and bands. Process them in a boiling water bath for 10 minutes.
8. Remove the jars from the wate bath and place them on a surface covered with a folded kitchen towel. Cover with a second kitchen towel. Let them sit for 24 hours before moving them to their permanent storage and remove the bands.
Makes 3 half-pint jars
Food photography by Ted Rosen.

Every year I make jams but from different fruits. If I have strawberries I make jams or I just can them. They are very tasty. I also recommend you to try making a jam from wild strawberries. Last year I didn’t have so many crops from strawberries so I decided to use mine will strawberries. You have to have lots of them to make a big jar as they are very small. I made it from this variety: https://gardenseedsmarket.com/wild-strawberry-rugia-seeds-fragaria-vesca-640-seeds.html because it’s sweet and perfect for canning. Have you ever tried making a jam from wild strawberries?
Watsonville, the strawberry Capital of the World, is just a short drive from here, but strawberries are something that I do not grow in my home garden. I m none too keen on most types of them anyway. Even the good ones take too much work, and are just too risky.