The balance sheet of a pie

Today I made Ricotta Wheat Pie, a traditional Neapolitan recipe. I had earmarked it a long time ago but never got to it because it seemed quite involved. It was.

Not counting the components of each, I used 16 kitchen tools and gadgets: a pot to cook the wheat berries, a cooking spoon, a small food processor, a blender, two bowls, an egg separator, two spatulas, a small kitchen knife, a pastry roller, a plastic container to chill the dough, a cookie press, a scoop, a jelly roll pan, and a cake pan. Plus two disposables: a sheet each of wax paper and aluminum foil. If the citron and orange peel had not been so dried out, I would have been able to avoid using the blender but only its ice crush function could chop them up. And, if I had had more time, I could have cooled the wheat in the pot instead of spreading it on a jelly roll pan and set it over ice packs to speed up the process. Even discounting those two, it’s a lot of dirty dishes for one pie.Counting the time I spent on this, the gas for the stove, the electricity for the oven, the hot water to wash all those dishes, and… it would have been probably more economical and ecological to drive into town and buy a cake. But it would have certainly not been the type of cake I would want to eat! And, most importantly, I would not have had so much fun (despite the cleaning up). I also finally got the cookie press to work that I bought years ago and, it turned out, I had always screwed together the wrong way.

In 2010, the average American according to The New York Times watched 34 hours of TV every week. That’s baking 8.5 pies like this if you allocate a generous 4 hours active time from start to finish. I rarely watch TV and rather bake.

Seeing the pie cooling on the counter and smelling it all over the house gives me great satisfaction. If it tastes as good as expected and my family likes it, even better.

The recipe is adapted it from Anna Teresa Callen’s My love for Naples.Ricotta Wheat Pie (Pastiera Napoletana di Grano)

Crust:

2 cups flour

¼ cup sugar

1 stick chilled butter, or 4 ounces Land O Lakes butter with canola oil (first time I tried this)

1½ ounces chilled vegetable shortening

1 large egg

Filling:

4 cups wheat berries

1 tablespoon butter

1 untreated lemon

1½ cups milk

½ teaspoon cinnamon

1½ tablespoons + 1 cup sugar

1 pound low-fat ricotta

2 tablespoons orange flower water

2 tablespoons diced citron

1 tablespoon candied orange peel

6 eggs

1. For the crust, put the flour and sugar in a food processor and process to a coarse meal. Add diced butter, shortening and egg and process until the dough forms a ball around the blade. Transfer the dough to a container and refrigerate.

2. For the filling put the wheat berries in a small heavy pot with 4 cups water and the butter. Bring to the boil, then turn down the heat and simmer, covered, for about 2½ hours. Check for water and stir once in a while to make sure it does not cook dry.

3. Drain the wheat berries and return them to the pot. Zest half of the lemon in one large strip and add it to the pot with the milk, the cinnamon and 1½ tablespoons sugar. Bring to the boil, then turn down the heat and cook, uncovered, for 45 minutes until the milk has been completely absorbed. Stir often to make sure it does not scorch, and reduce the heat even further as necessary.

4. Roll out three-quarters of the dough on a sheet of wax paper to fit a greased 10-inch cake pan plus dough to come up almost all the way up the edges. Fit it into the cake pan and even out the edges with a knife. Roll out the rest of the dough and cut narrow strips for a crisscross pattern, or use a cookie cutter / cookie press to cut out shapes to your liking. Place them on a plate lined with the wax paper and put everything in the freezer.5. Remove the lemon peel from the wheat berries and let cool.

6. Preheat the oven to 350 degrees F.

7. Finely zest the rest of the lemon. Put it in the food processor together with the orange flower water, diced citron, orange peel, 1 cup sugar and ricotta and process until the citron and orange peel are finely chopped.

8. Separate the eggs and add the egg yolks to the mix. Beat the egg whites until stiff.

9. Mix the cooled wheat berries with the ricotta mix. Fold in the stiff egg whites. Pour the filling into the prepared crust.

10. Bake in the preheated oven for 20 minutes. After this time, the filling should be set enough to the top crust won’t sink. Carefully remove the cake pan from the oven. Place the cutouts or dough strips on the surface in a decorative pattern and return the cake pan to the oven.

11. Bake for another 55 minutes, or until the filling is set and the top is golden brown. If the top darkens too much, loosely place a greased sheet of aluminum foil on top. Remove the pie from the oven and cool on a cake rack.
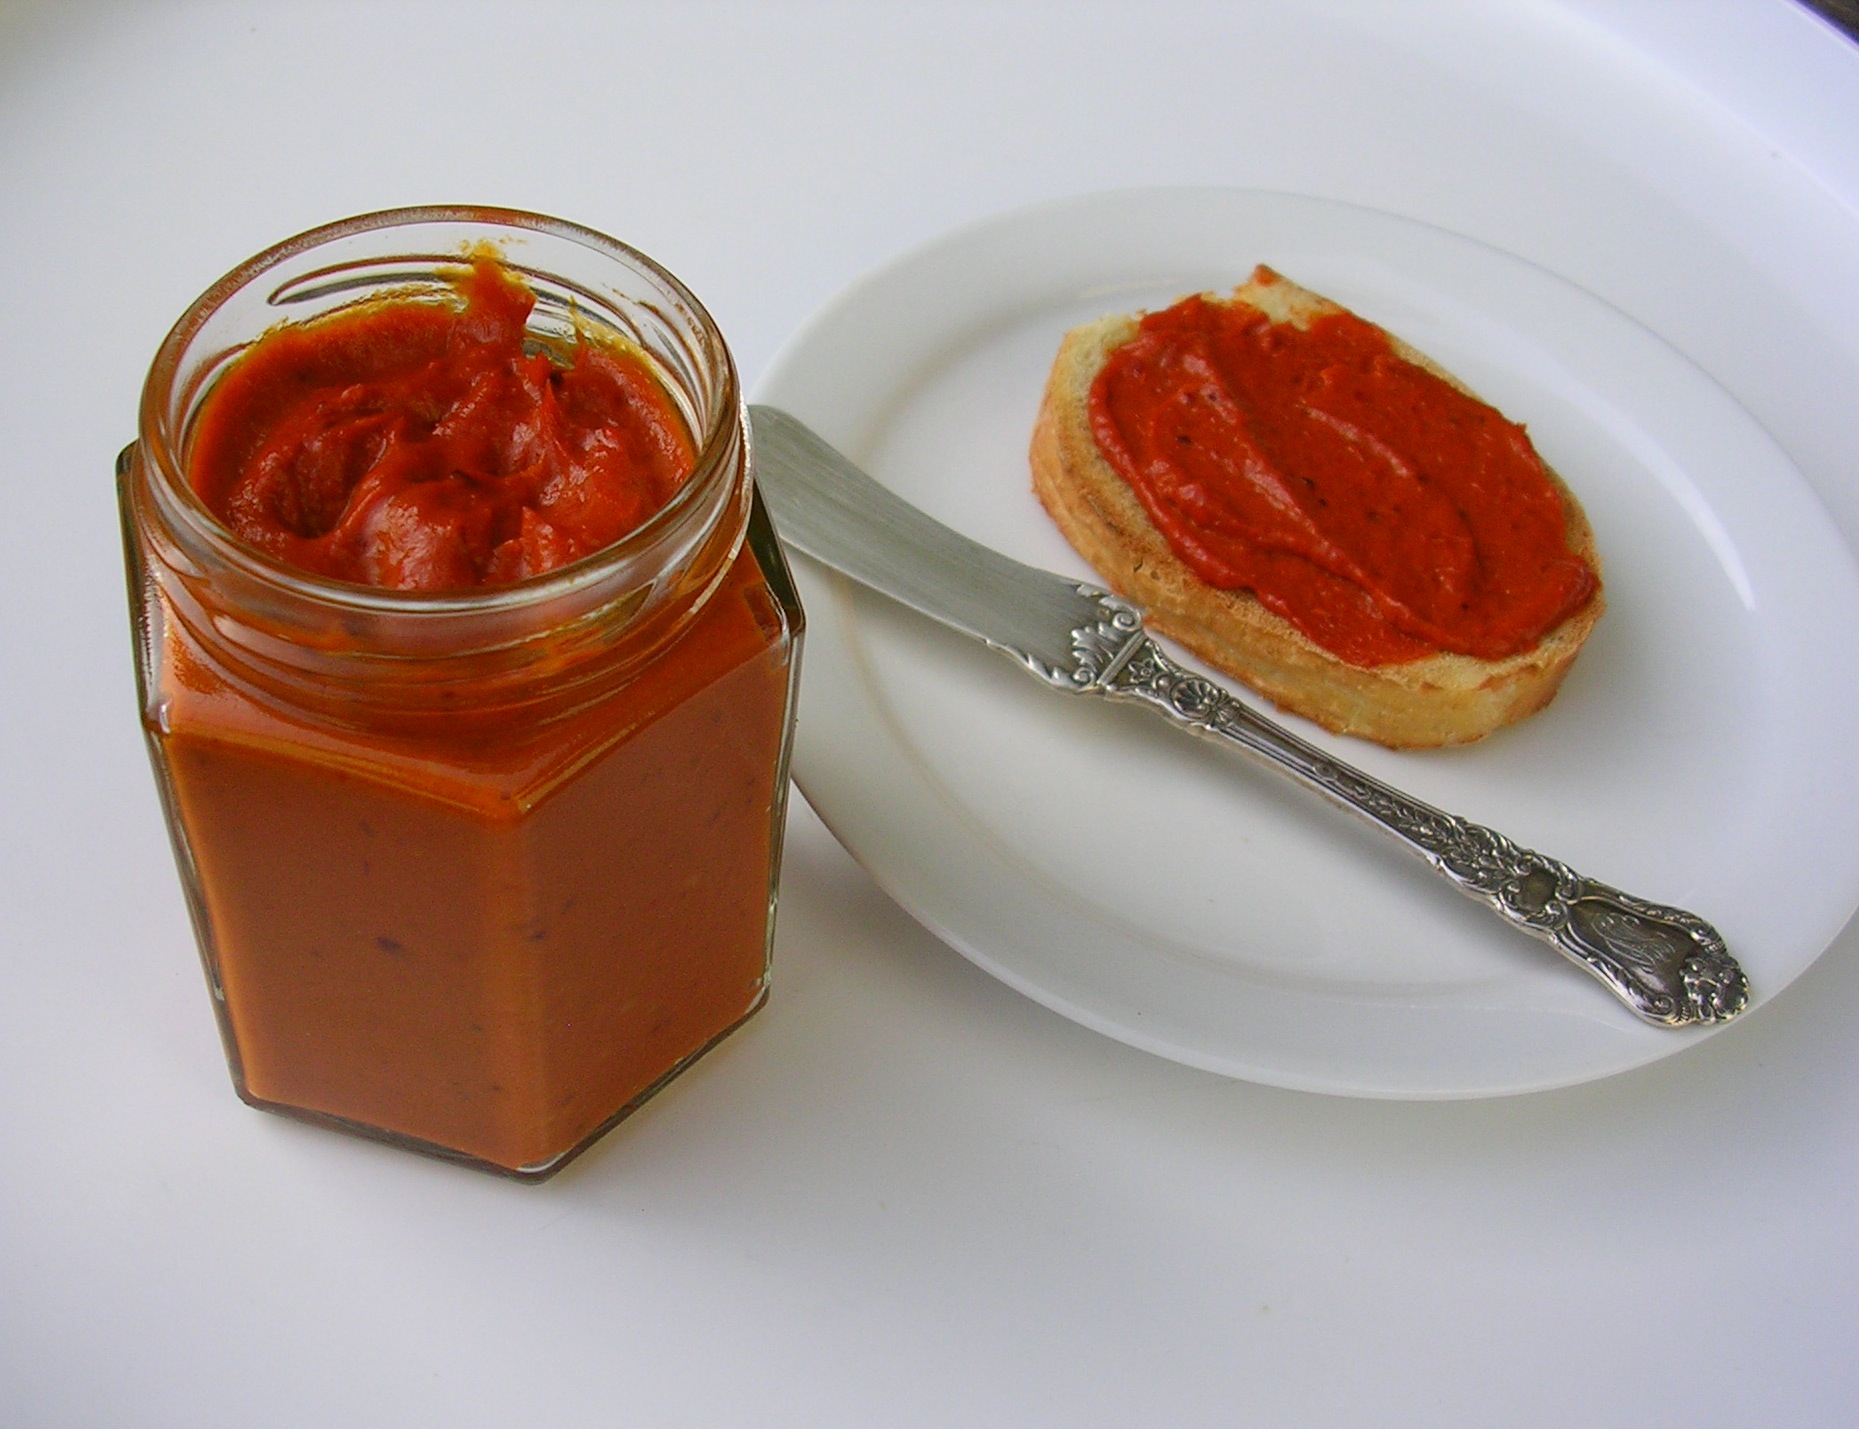
 

From snails to kale

It’s funny how dramatically food tastes can change between childhood and adulthood. When I was little, my favorite dish to order at restaurants were vineyard snails in a parsley-garlic sauce, turtle soup and frog legs. Now I must explain that in the late 1960s and early 1970s, those foods might have been a bit unusual for a child but they were not stigmatized as they are today. Turtle soup was President Taft’s favorite food and he even had a special chef dedicated to making it without ever being accused of animal cruelty.

Unless I were very hungry and had nothing else to eat, I would not touch any of those foods any longer. Today I love many of the foods I dreaded as a child: beets, kale, capers, white asparagus… It was definitely the way they were prepared that made all the difference. The only form of beets I remember were soft, soggy pickled beets in a can, the smell and look of which already appalled me. Those beets had nothing to do with a beet roasted in the oven and tossed into a crunchy wholesome salad. Kale was similarly off-putting. It only came in a heavy stew with fatty meat, sausages and overcooked potatoes.

I grew kale for the first time last fall and used it only for vegetarian dishes, the One Pot Kale and Quinoa Pilaf from food52 and these simple kale chips being my favorites. Yesterday I harvested the last kale to make room for the spring crops.

These kale chips are addictive. They are very easy to make but require a bit of time, as you need to stand by and make sure they don’t burn. After I charred one batch I decided to leave them in the switched-off oven for the night; this morning, they were perfect.

There is room for experimentation here. Most recipes for kale chips use herb salt and olive oil, but I find that garlic-infused or herb-infused oil tastes great as well. This time, I used the strained leftover oil from marinating feta cheese with herbs and garlic, which I found a pity to discard.

Lately I have been too tied up with other things to do anything about the garden but today I will finally order seeds. I cannot think of a better and more motivating nibble to accompany this than homemade kale chips. That is, if there are any left, as my husband loves them too.

Kale Chips

1 large bunch of kale

1-2 teaspoons olive oil or garlic oil

2 teaspoons mixed dried herbs, such as Herbes de Provence

2 teaspoons kosher salt

1. Preheat the oven to 350 degrees F. Line a baking sheet with parchment paper.

2. Remove the middle ribs from the kale leaves with a sharp knife or kitchen scissors and discard them. Tear the leaves into bite-size pieces. Toss with olive oil, herbs and salt to coat evenly.

3. Spread on the prepared baking sheet and bake in the preheated oven for 15 minutes, turning once or twice. Switch off the oven and leave for a few hours until the chips are completely dry.

Green legacy

Pepper spreadMy father-in-law, who passed away this month, used to tell me about his beginnings in gardening: two tomato plants and a cucumber in a Victory Garden at the end of World War I. Children, especially those of struggling immigrants, did surely not receive any pocket money in those days, so the dime he received as a prize for the tomatoes must have been quite special for a nine-year-old.

He also told me that two of the most difficult things he had to do in his life was closing his medical practice upon retiring, and taking down his garden when he was no longer able to physically do the work.

I never saw my father-in-law’s garden, as it had disappeared years before I first met him.  I only saw photos of it, yet I could tell that the area that is now just lawn must have once delivered a cornucopia of fruits and vegetables.

We talked gardening often, he sitting at his usual place at the end of the long kitchen table with a view of the back yard where his garden used to be. I remember him laughing out loud and shaking his head over and over again when I told him I had planted almost two dozens of tomato plants. “What the heck will you do with so many tomatoes?” he asked. My answer, “Soup, sauce, freeze them whole so I don’t have to ever buy canned tomatoes,” did not quite seem to convince him. However, after we brought along a few bags of homemade frozen cream of tomato soup in the midst of winter, he did not question the number of my tomato plants again.

These past few weeks have not been easy, and I have even wondered whether I would have the oomph to plant a garden this year. But then I remembered how my father-in-law told me that he always had some sort of a garden and was growing something, no matter where he lived, and no matter what difficult times he was going through. When we buried him, we buried his rusty shovel with him. Thinking about this, I feel that I simply must plant a garden this year to continue in his spirit.

After several bags of frozen bell peppers and jalapeños have reproachfully looked at me every time I opened the freezer, I finally made a batch of red pepper spread today. I never bother to remove the skins, those are all healthy fibers. After cooking the peppers slowly in the oven and pureeing them, the spread is so smooth it is almost impossible to tell the peppers have not been skinned. The spread tastes a bit like Harissa but it is much milder. For a hotter version, just add more jalapeños. Starting with two pounds of seeded peppers sounds like a lot but they shrink considerably.

Pepper spread before pureeingRed Pepper Spread

6 to 7 large red bell peppers, seeded (about 2 pounds)

2 jalapeños

1/3 cup olive oil

6 small garlic cloves (3-4 fat ones)

Salt

Extra-virgin olive oil

1. Preheat the oven to 375 degrees F.

2. Coarsely chop the peppers. Seed the jalapeños and chop finely. Chop the garlic.

3. Mix all ingredients except for the salt and put in in a large ovenproof dish with a lid, ideally a cast-iron casserole or Dutch oven.

4. Cover and cook for 1 hour, then remove the lid and continue cooking until the peppers are very soft and look almost melted. Stir and scrape down the sides once in a while with a rubber spatula.

5. Remove from the oven and cool. Puree very finely and salt to taste.

6. Fill the spread in a glass jar and pour a little bit of extra-virgin olive oil on top to prevent the spread from drying out. Refrigerate and use within a month.

Makes 1 jar

Breaking the rules for paella

For kids, three months of summer vacation can be quite boring if you live in an isolated location in the country and cannot just walk down the street to hang out with friends. To keep our son busy (and preserve our sanity), a few summers ago my husband commissioned him to do a few short videos. One of the videos he made was about high-fructose corn syrup. Our son discovered that we are an almost HFCS-free household. When he searched our pantry and fridge for props, the only product containing HFCS he found was a bottle of mustard.

MSG is another blacklisted ingredient. It is not difficult to avoid HFCS and MSG when you cook mainly with fresh or frozen ingredients and make as much as possible from scratch. Yet I must admit that I deviate from my own rules once in a while for convenience or taste, or both.

For paella, for example, I use yellow rice mix, aka Spanish rice, which sometimes contains MSG. When I cannot find brands that are MSG-free, I remove about half of the heavy seasoning from the uncooked mix by placing it in a colander and shaking it a few times over the sink. The remaining amount of MSG is minimal. MSG usually gives me terrible migraines but I have never felt a thing after eating this paella.

This recipe is adapted from Paella, Fast and Easy in Mark Bittman’s The Minimalist Cooks at Home. I doubt whether Mr. Bittman would agree with my using yellow rice mix from the package but since I adhere to most of what he advocates so passionately, I hope he would let this one slip.
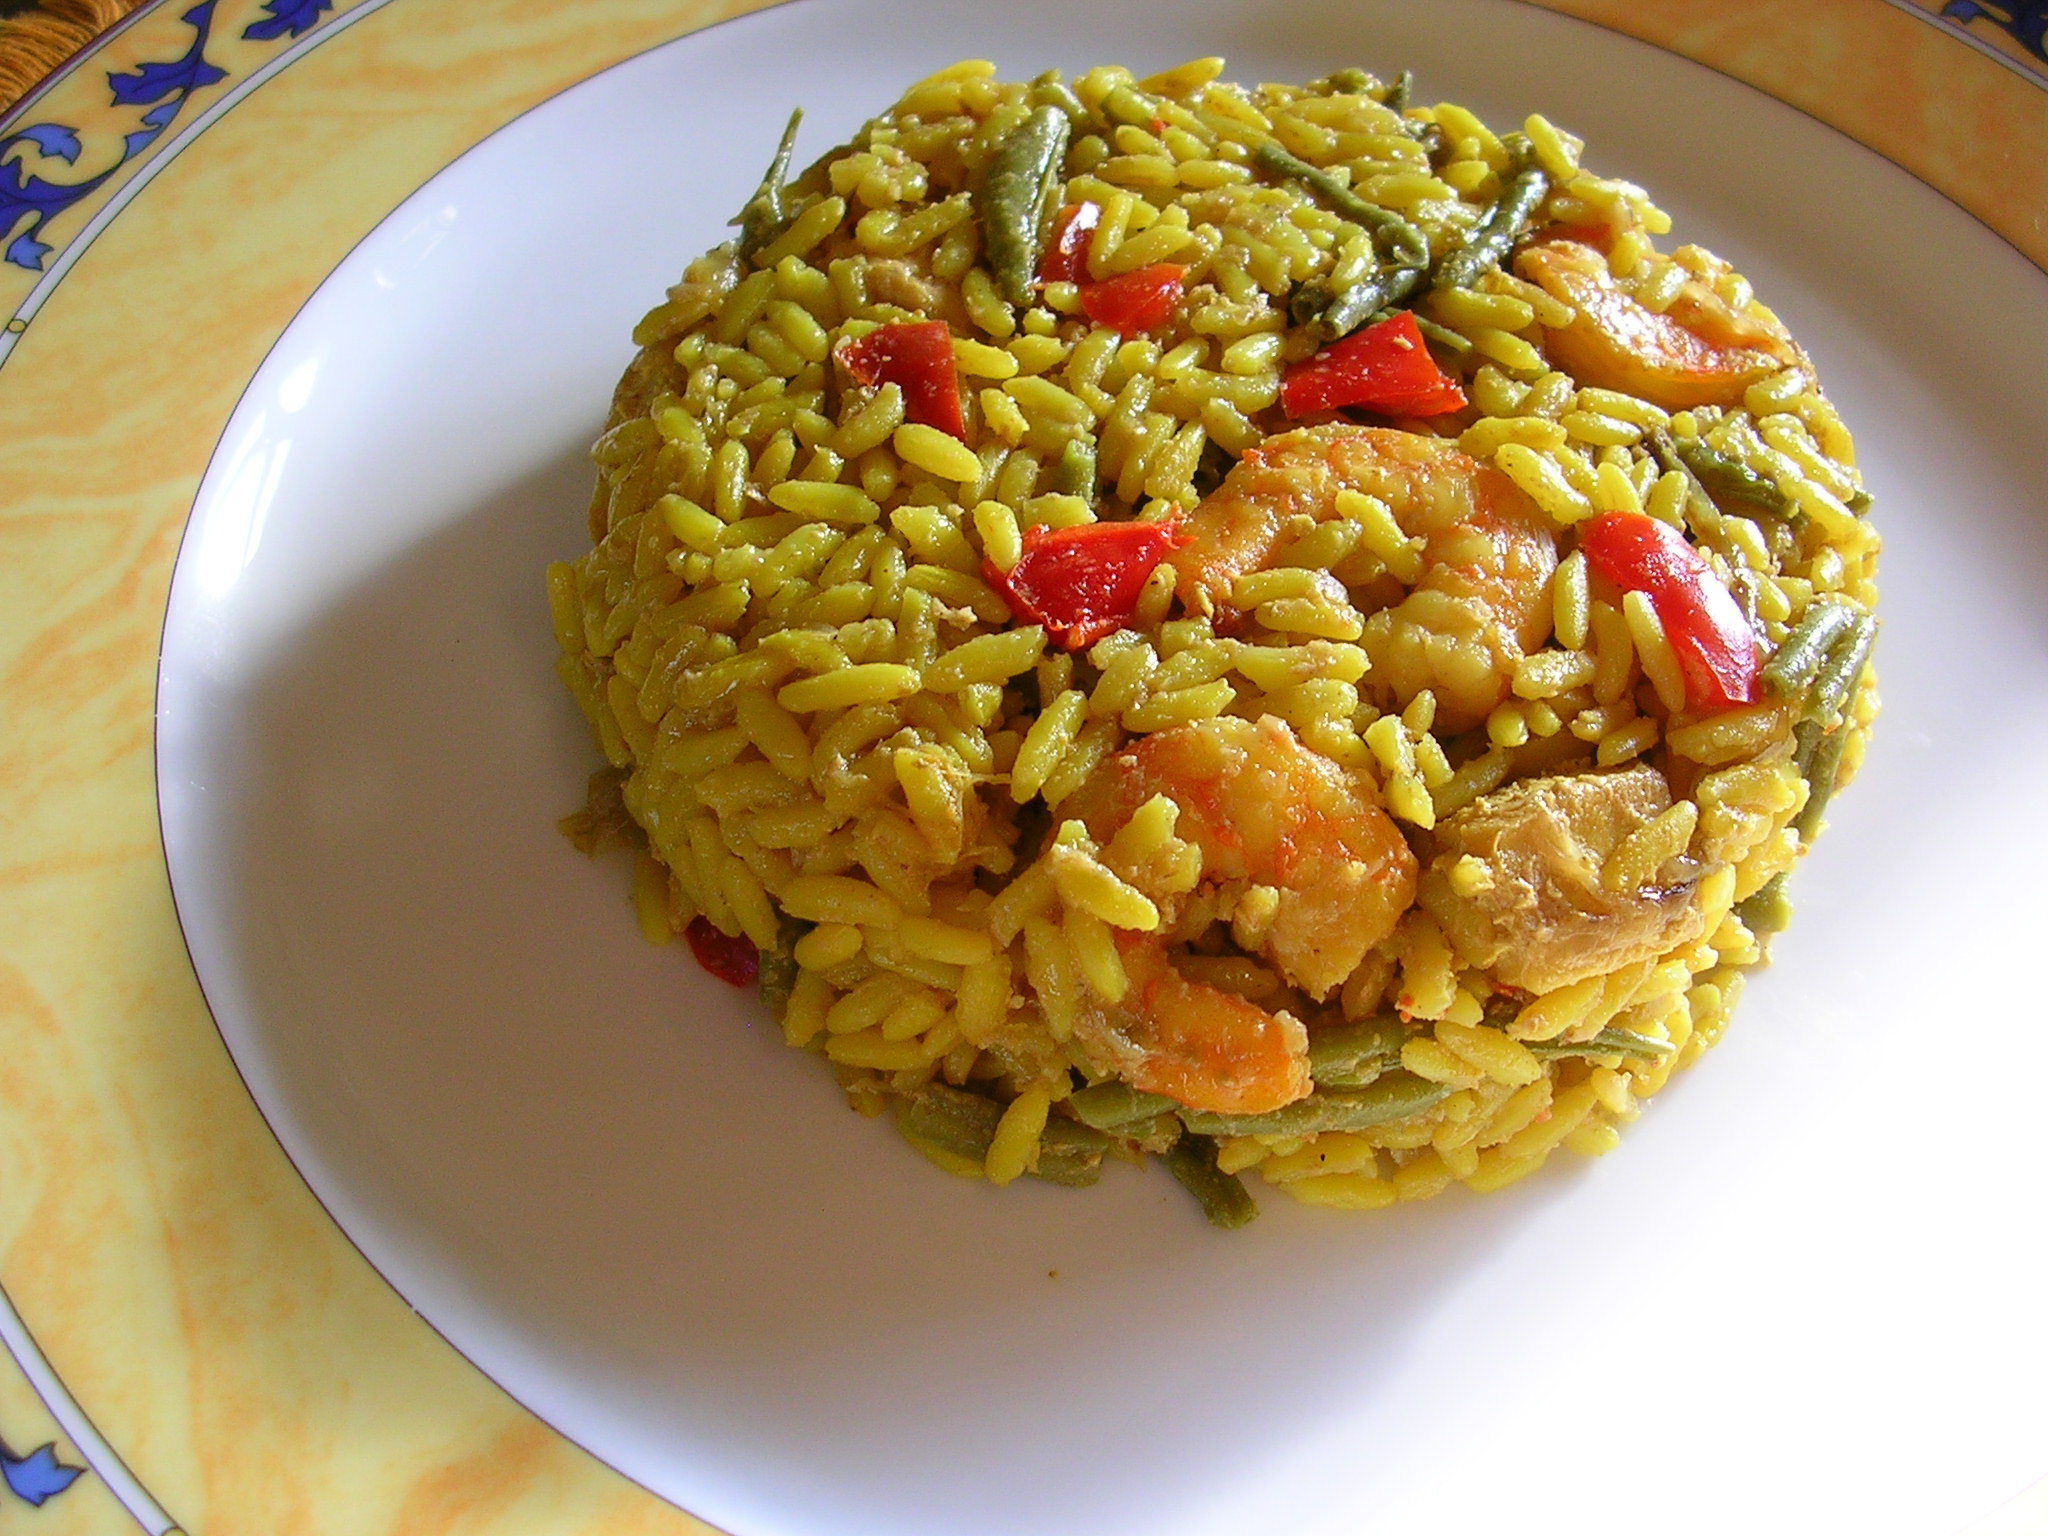
Most of the vegetables for the paella – peas, greens beans, and bell peppers – come from my garden, fresh during season, frozen in the winter. When I made the paella yesterday I did not have peas, as the supply of peas from the garden is already gone. We were also out of carrots; unaware of my dinner plans, my husband fed the last carrot to our dog, whose favorite treat is carrots.

To make up for the missing peas and carrots, I doubled the amount of bell peppers and green beans. And, instead of chicken broth, which I normally use for liquid, I used homemade turkey broth from our Thanksgiving turkey, also coming from the depth of our freezer. This recipe offers lots of flexibility in terms of ingredients.

One little trick: my son does not like peppers so I omit them in half of the paella and place a piece of triple-folded aluminum foil across the pan. After the paella is cooked, that barrier can be removed very easily.

Paella

4 cups chicken broth

1 cup fresh or frozen green beans

1 red bell pepper

1 carrot

1 onion

1 swordfish steak (about 6 ounces)

3 tablespoons olive oil

2 cups yellow rice mix (Spanish rice), some of the seasoning removed as described above

1 cup fresh or frozen peas

½ pound uncooked shelled and deveined medium-size shrimp (41-50 count)

1. Preheat the oven to 450 degrees F.

2. Heat the chicken broth in a saucepan.

3. Cut or break the green beans into bite-size pieces. Cut the pepper in half, remove the seeds, and cut into ½-inch pieces. Peel the carrot and cut into ¼-inch cubes. Halve the onion and slice very thinly. Cut the swordfish into ½-inch cubes.

4. Heat the oil in a large cast-iron skillet. Add the onion and cook for 5 minutes over medium heat until translucent, stirring often.

5. Add the rice mix and stir to coat. Cook for 2 minutes until it turns glossy. Add the hot broth and stir (stand back, it will steam when you add the broth).

6. Add the shrimp, fish, and vegetables, distributing them somewhat evenly. Bring to the boil, then carefully transfer the pan to the preheated oven. Cook for 25 to 30 minutes, until the rice is cooked through and the broth is absorbed. If during the cooking some of the vegetables start to poke out, gently push them back into the liquid so they won’t dry out. Do not stir.

7. Remove the paella from the oven and let stand for 5 minutes before serving.

Makes 6 to 8 servings