Me and my steam juicer

Concord grape soda

As I mixed one of the last jars of Concord grape juice  from last year with seltzer water it occurred to me that there would not be any of this homemade soda if it weren’t for the steam juicer that I brought back from Germany. Therefore I simply must rave about this wondrous invention.

Steam juicerA steam juicer is a large pot where the base is filled with water and the top colander holds the fruits or vegetables. As the water boils and softens the fruit, the juice drips down from the colander into the juice kettle, from where it is released through a drain tube. The drain tube has a clamp so for the first hour or so, depending how hard and juicy the fruit is, you let the juice accumulate in the kettle, then open the clamp and let the juice run into a bowl placed underneath.  I’ve had the steam juicer for several years yet I still relish the moment when I open the clamp – it feels a bit like digging for water or oil when a jet of the precious good eventually comes bursting out of the ground.

The yield is much bigger than with a jelly bag, it takes a fraction of the time, and it is no hassle at all to clean, just make sure you wash the steam juicer right after using; only the colander needs a bit of soaking sometimes. Except for grape juice, which I can as is with about ¼ cup sugar per quart of juice, I use most of the juice for making jelly.

The drawback: in the United States, steam juicers are expensive, especially the stainless steel models cost $100 and up. I do not recommend aluminum because it reacts with acid. A steam juicer is a small investment but for me it is an essential canning tool, just like a few good tools are essential in the garden. A rototiller for the garden? Never! A steam juicer for the kitchen? Absolutely. I cannot do without it.

Steam juicer elderberries

Photos by Ted Rosen

Autumn in a jar

One of my favorite things in October are the crabapple trees on a sunny day like yesterday. With their branches bare of leaves, the tiny vibrant apples stand out even more against the blue sky. I wanted to spend more time taking in that stunning view. And since I had set my mind on trying out crabapple butter this year, what better way to spend time near the crabapples than picking!

Usually by mid-October we have already harvested a bucket of crabapples for jelly (what is left on the trees is eaten by the wild turkeys), only this this year we haven’t gotten around to it yet. Picking crabapples is a two-person operation – to reach the branches we have to drive the truck underneath each tree.

Yesterday I was home alone, and without the truck. I fetched a stepladder, fully aware of what I was doing was pretty risky business on that steep hill. I certainly did not want to get stranded with a twisted ankle or worse for a basket of crabapples so I was very careful and restrained myself from any climbing maneuvers. And I left alone the clusters of beautiful crabapples that beckoned to be picked but I could not safely reach.

I neither had the time nor wanted to spend hours standing by the stove stirring, therefore I cooked the crabapple butter in a cast-iron Dutch oven in the oven. In the summer I made plum butter that way and it turned out great. It was late when I finished so I did not can the jars until this morning. That was not a problem, I simply slowly reheated the crabapple butter, stirring constantly until the surface, which had dried out a bit overnight, became smooth again.

To prevent the surface from drying out in the jars, I added a tablespoon of juice to each jar on top of the crabapple butter. I happened to have some quince juice on hand so I used that but I think that apple cider or apple juice would be ideal, and orange juice would work just as well.

Crabapple Butter

4 pounds crabapples, stems removed and picked over

1 teaspoon cinnamon chips

2 cloves

4 cardamom pods

1 star anise

1 teaspoon dried ginger chips (or 1 thumbnail size-piece of peeled fresh ginger)

2 cups sugar

Juice to pour on top (apple cider, orange or apple juice)

1. Wash the crabapples several times in cold water. Put them in a large heavy pot and cover with water. Bring to a boil, then cook over medium heat for 30 to 45 minutes, until the apples are soft and can easily be crushed with a wooden spoon.

2. Preheat the oven to 325 degrees F. Tie the spices in a piece of cheesecloth.

3. Pass the cooked crabapples through the fine sieve of a food mill. You should have about 4 cups of pulp. Return it to the rinsed pot and add the sugar. Cook over low heat and stir until the sugar dissolves.

4. Pour the pulp in a medium-size Dutch oven, or another ovenproof dish with a tight-fitting lid. The dish should not be too large, otherwise the butter will scorch. Add the mix from the pot and bury the spice bag in it.

5. Cover the pot and place it in the middle rack of the preheated oven. Set the timer for 30 minutes. After 30 minutes, stir well and scrape down the sides and over the bottom of the dish. Repeat this every 30 minutes for about 3 hours, until the butter is so thick that a spoon leaves a trace.

6. Remove the spice bag. Fill the hot crabapple butter in sterilized canning jars and push it down with a knife to remove any air pockets. Pour 1 tablespoon juice on top of the butter in each jar. Process the jars in a boiling water bath for 10 minutes.

Makes 4 to 5 8-ounce jars

Gooseberries: Delicious but vicious

There is no other way to say it: growing gooseberries is a pain. The bushes with their long thorns are outright dangerous. Wearing sturdy gloves when picking the small berries is not really an option so harvesting them often leaves me with deep scratches on my hands and lower arms. My husband still has a few scars on his calves from the time when he moved a row of raspberries nearby and the gooseberry thorns pierced through his jeans. Also, removing the minuscule blossom ends and stems takes forever but it has to be done, otherwise the pie, compote or whatever you make tastes grainy.

Wouldn’t you know it that of my three gooseberry bushes, the cultivar with the largest berries and the easiest to pick, Invicta, yielded exactly four (4) gooseberries this year. Meanwhile the other two cultivars, Hinnonmaki Red and Pixwell, are filled with tiny berries. They are tastier than the hairy Invictas so that’s at least one trade-off for being more labor-intensive.

Initially I was leaning towards tossing the entire 3½ pounds of gooseberries without any tedious preparation into the steam juicer to make gooseberry jelly. But then my culinary curiosity took over and I wanted to try something new, special, and hopefully delicious.

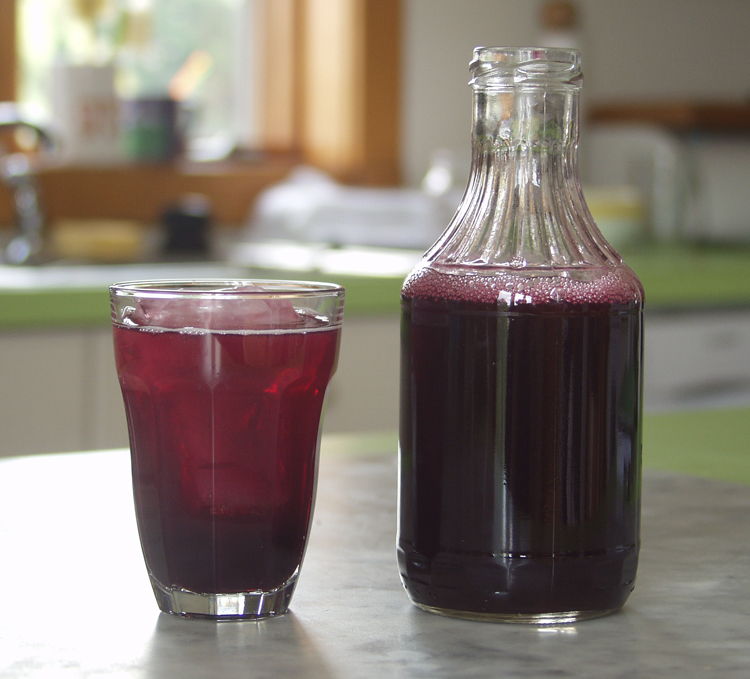
I have always wanted to make gooseberry chutney. When I saw that the recipe for Gooseberry Relish by food writer Edward Schneider in the The New York Times is made with only five ingredients, including elderflower cordial, I had found my inspiration. What a perfect reason to pop open the first bottle of my elderflower syrup!

For a moment I was slightly concerned about the relish being suitable for canning, as the recipe does not mention this option. After all, I want us to savor the relish in the winter and not now, in the midst of fruit cornucopia. But after consulting with my dietitian friend, I was reassured that the gooseberries contain enough acidity to make canning safe.

The other recipe I tried was Gooseberry Chutney, to which I added elderflower vinegar.

I have barely started to harvest from the third gooseberry bush. Soon I will be out there again picking, wincing each time I hit a thorn. But the fact that I can just walk into the garden, while other people hungry for gooseberries hunt them down at farmers’ markets, makes me appreciate more what I have. Also, with the taste of that delicious gooseberry relish and chutney still lingering on my tongue, I know again what I’m doing this for.

Gooseberry Relish

1 large piece of ginger (3 to 4 inches)

2 teaspoons yellow mustard seeds

2 pounds gooseberries, blossom ends and stems removed, washed

2/3 cup sugar

1 cup elderflower syrup

1-2 tablespoons dark brown sugar

1. Peel the ginger, cut it in half lengthwise and slice it thinly. Tie it into a piece of cheesecloth, together with the mustard seeds, and secure the bag with butcher twine.

2. Place the bag in a heavy saucepan with the gooseberries, the sugar and the elderflower syrup. Stir to mix and slowly bring to a boil, then reduce the heat and simmer uncovered for about 1 hour, until the relish thickens. Stir every now and then, more often as it thickens, to prevent the relish from sticking to the bottom of the pan. Towards the end, check for sweetness and add brown sugar to taste.

3. Discard the ginger bag. Fill the piping hot relish in sterilized jars placed on a damp kitchen towel. Wipe the rims of the jars with a damp piece of paper towel to remove any drips. Place the lids and the bands on the jars and process in a boiling water bath for 10 minutes.

4. Let cool and set for 24 hours without moving the jars.

Makes 2 to 3 half-pint jars

Gooseberry Chutney

1 medium piece of ginger (1 inch), peeled and chopped

1.5 pounds gooseberries, blossom ends and stems removed, washed

1 medium yellow onion, sliced thinly

2 garlic cloves, crushed

3 fresh thyme twigs, leaves only

3 marjoram twigs, leaves only

1.5 cups sugar

1 cup elderflower vinegar

½ teaspoon yellow mustard seeds

½ teaspoon salt

1. Put all the ingredients in a heavy saucepan. Stir to mix and slowly bring to a boil, then reduce the heat and simmer uncovered for 45 minutes to 1 hour, until the chutney thickens. Stir every now and then, especially towards the end, so it won’t scorch.

2. Process in boiling water batch as described in the Gooseberry Relish recipe above.

Makes 2 to 3 half-pint jars

Late bloomer

The best I could do which chive blossoms in the past, was stick them in a vase. I am an admitted late bloomer when it comes to learning about edible flowers. This year I am at last discovering all the wonderful things you can do with them. I wish I had more chive blossoms right now.

The first bloom of the chives yielded just enough blossoms to make a tiny amount of chive vinegar. I absolutely do not like the taste, smell and especially aftertaste of raw onions. Letting a chopped shallot sit in vinaigrette for a mere hint of onion flavor, and strain it afterwards is my tolerance limit for raw onions. So I thought chive vinegar would be a good way to get the onion flavor without the onions.

Asparagus is one of the crops I do not grow in my garden because I can buy it super fresh from local farm stands. The asparagus was supposed to be for dinner tonight. Yet before I had even washed the dishes my husband and I had nibbled most of it for lunch before heading back to our offices.

No doubt, I will have to plant more chives for the blossoms alone, so I can make more of that vinegar.

Asparagus with Sauce Tartare

The formula for the vinegar is simple: Put freshly picked untreated chive blossoms, washed and drained, in a screw-top jar. Add apple cider vinegar, enough to immerse the blossoms. Cover and let sit at moderate room temperature, away from direct sunlight, for 5 to 7 days until the blossoms are completely discolored. Shake the jar once or twice a day. Strain and discard blossoms.

The Sauce Tartare is adapted from Julia Child’s Mastering the Art of French Cooking.

1 pound green asparagus

1 tablespoon lemon juice

Sauce Tartare:

3 large hard-boiled eggs

1 tablespoon Dijon mustard

¼ teaspoon salt, more to taste

2/3 cup olive oil

1 tablespoon chive vinegar

2 tablespoons capers, drained

3 tablespoons finely chopped chives

Freshly milled black pepper

1. Wash the asparagus and trim the ends.

2. Bring water to a boil in a large deep skillet. Add the lemon juice and cook the asparagus uncovered at low to medium heat until it can be pierced with a kitchen knife. Drain, rinse with cold water, and drain again. Set aside.

3. For the Sauce Tartare, separate the yolks from the eggs, leaving the whites as intact as possible. Finely chop the egg whites and set aside. Mash the yolks with the mustard and the salt until no lumps remain.

4. Gradually add the olive oil and whisk thoroughly by hand until you obtain a thick smooth emulsion. Add the vinegar and whisk until fully incorporated.

5. Finely chop the capers and add them to the sauce with the chives. Season with salt and pepper. Spoon some of the sauce over the asparagus, and sprinkle with chopped egg whites.

Makes 2 servings