After-the-storm elderberry sauce

After a power outage for two and-a-half days due to hurricane Irene, and the emergency evacuation of our freezer chest, filled almost to the top with produce from the garden, to friends who did not lose power, I had only limited energy left for lengthy food rescue operations.

The storm had knocked down several handfuls of elderberry clusters. Elderberries ripen unevenly so I usually leave them on the plant until all the berries are black, hoping I am quicker than the birds. The elderberry clusters I collected still had some green berries on them but that’s all right.

I have never made anything else than elderberry soup or jelly from elderberries. There were not enough storm berries for any of those but I know from Elderberry Soup that elderberries and apples are a good combination. So I made this easy after-the-storm elderberry sauce with apples. I had it with Greek yogurt but I can imagine it also delicious on cottage cheese, rice pudding, with waffles or pancakes.

Let’s hope we won’t have another storm like this in a long time but if we ever do, I will try the sauce with pears, which also complement elderberries very well.

Elderberry Sauce with Apples 

2 Gala apples

2.5 cups stemmed and washed elderberries

1 cinnamon stick

1 strip of organic lemon peel

½ cup sugar, to taste

1 tablespoon cornstarch

1. Peel and quarter the apples. Remove the core and cut the apples into ½-inch dice. Put them in a heavy saucepan with the elderberries, the cinnamon, lemon peel and sugar. Add 2 to 3 tablespoons water to prevent burning before the elderberries release their juice.

2. Bring to a boil and cook, covered, 15 minutes, until the apples are very tender and the berries are easily crushed with a spoon. Stir occasionally during cooking.

3. Cool slightly and remove the lemon peel and cinnamon stick. Pass through the finest plate of the food processor. Scrape the underside of the plate – a lot of the thick pulp gets stuck there.

4. Return the sauce to the pot. Dissolve the cornstarch in 2 tablespoons cold water and add it to sauce. Stirring constantly, bring the sauce to the boil and cook for another 2 to 3 minutes, until it thickens and looks no longer starchy. Taste for sugar. Let cool and refrigerate.

Makes about 1 cup

Lydia’s way


My late German grandmother would nod in approval if she saw me making this. Although she never said it openly, wasting food was taboo with a capital T for her. Having lived through World War II, her definition of “wasting” was certainly more extreme than my mother’s; and I am yet another generation removed from her parsimony. Still, not using the many egg whites that I have left over from making custards, puddings, crème caramel and the like would never occur to me.

Since I cannot foresee when I will use them, I always freeze the egg whites in small containers. Mostly I use them for meringue cookies with chocolate or coffee flavor, a recipe adapted from The Joy of Cooking.

In July, when I was in charge of bringing ice-cream topping to a meeting of my Master Gardener group, I turned my usual meringue cookies into a crushed version.  I have had several requests for the recipe so here it is:

Crushed Meringue for Ice-cream Topping

3 egg whites

1 cup (200 g) sugar

2 to 3 tablespoons instant espresso or unsweetened cocoa, to taste

Canola oil or another neutral-tasting oil for spraying

Pinch of salt

1 teaspoon vanilla extract

1. If using frozen egg whites, thaw them in the refrigerator.

2. Mix the sugar with the instant espresso.

3. Preheat the oven to 250 degrees F. Line a jelly roll pan with aluminum foil sprayed with oil.

4. Beat the egg whites with a pinch of salt until they are very stiff, gradually adding the sugar and the vanilla.

5. Spread the batter evenly onto the aluminum foil and bake for 60 minutes, until dry to the touch. Remove the pan from the oven but leave the oven on.

6. Transfer the meringue onto a large cutting board and peel off the aluminum foil. It’s OK if it breaks into many pieces, as it will be crushed anyway.

7. Coarsely chop the meringue with a large knife and spread it out on the aluminum foil. Bake for another 30 minutes, until the meringue has barely any moist spots left. Turn off the oven but leave the meringue in with the door closed, which will dry it further.

8. After the meringue is cooled completely, store in tin cans. It keeps for several weeks.

The best thyme I ever had

After years of meager woodsy thyme plants, this summer a thyme plant from last year popped up again and supplied me with the largest amount of thyme I had since I started gardening.

Now I finally have enough thyme from my garden to make my own herbes de Provence, a mix of dried herbs. I only use herbs I have in the garden but in addition to the herbs listed below, the mix can also contain equal amounts of fennel seeds, marjoram, oregano, and a small amount of crushed dried lavender blossoms. Herbes de Provence are wonderful with roasted meat, chicken, oven-roasted vegetables or potatoes, and even in tomato sauce for pasta.

Herbes de Provence

Dried rosemary, chopped finely

Dried basil leaves, crumbled

Dried sage leaves, crumbled

Dried summer savory, crumbled

Dried thyme, crumbled

Mix the herbs and store in a tin can or a glass jar away from the light. Herbes de Provence are best used within a few months; as all dried herbs, they loose their flavor over time.

Overcoming the green tomato prejudice

Until now I have been heavily prejudiced against green tomatoes. Not that I ever ate a green tomato. When I occasionally had green tomatoes in the garden because a branch broke off, or I ended up with green tomatoes at the end of the season, I would rather throw them on the compost pile than using them for cooking.

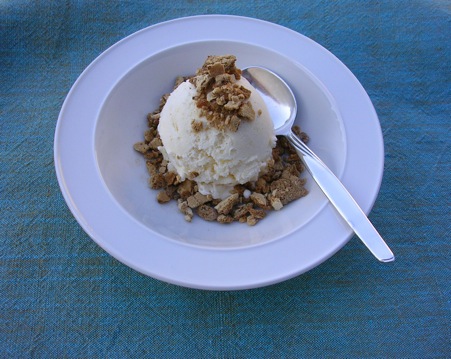
Maybe it’s the idea of eating something unripe that put me off. I know fried green tomatoes are a southern specialty but I was never tempted to try them. I am not a health fanatic but when I use artery-clogging ingredients, I prefer do to it when there is no alternative, such as butter in a piecrust. Also, I do not like the idea of buying additional produce in the height of the harvest to make something with green tomatoes.

When I collected a couple of pounds of green tomatoes from the garden this week, I reconsidered. I constantly try new things, so why not give green tomatoes a second chance and make chutney? I browsed recipes online and went through my cookbooks for inspiration. The only condition I set for myself was that I would minimize the purchase of extra ingredients. Since I have jalapeno peppers in the garden right now (also a premiere), and lots of fresh garlic, the only thing I had to buy for this Green Tomato Chutney were apples. All the other ingredients were staples I had in the house.

As the prospective main chutney eater besides me does not like it too spicy, I removed the seeds from the jalapenos. I am glad I did because the chutney is already quite hot as is. For a hotter version, simply include some or all of the seeds.

I don’t think I will ever actually pick green tomatoes but at least I have a simple recipe that I like in case green tomatoes come upon me. I look forward to opening the first jar of chutney and eat it with Indian food this fall or winter.

For now it’s back to fresh red tomatoes.

Green Tomato Chutney

2 to 2¼ pounds green tomatoes

10 garlic cloves

1 large onion

1 large or 2 small tart apples (I used green summer apples)

3 jalapeno peppers

1 1-inch piece fresh ginger

1 tablespoon black peppercorns

1 tablespoon whole allspice

6 cardamom pods

1 pound 6 ounces Turbinado sugar

1 tablespoon salt

1 cup white wine vinegar

3 bay leaves

1 tablespoon yellow mustard seeds

6 whole cloves

1 teaspoon dried orange peel

1 teaspoon finely grated zest from an organic lemon

You also need:

A canning pot, or a very large stockpot

5 half-pint canning jars

5 bands

5 new (unused) lids

1. Remove the core from the tomatoes and cut them into 1-inch dice. Slice the garlic cloves thinly. Chop the onion. Peel the apples and remove the core. Cut the apples into 1-inch dice. Cut the jalapenos in half and remove the seeds. Chop the jalapenos very finely. Wear disposable gloves to do this, or wash hands thoroughly afterwards to avoid skin and eye irritation. Peel and finely chop the ginger.

2. Crush the peppercorns, allspice and cardamom in a mortar.

3. Mix all ingredients in a non-corrosive pot (no aluminum) and mix well. Cover and refrigerate for 8 hours.

4. Slowly bring the mix to a boil. Cook uncovered for 20 minutes. Fill into sterilized canning jars using a slotted spoon, as you don’t want to fill the jars with too much liquid but make sure the chutney is fully immersed. You will have about 1 to 2 cups of cooking liquid left over; discard. Close jars with brand new lids and bands immediately and process in boiling water bath for 10 minutes.

5. Remove from the water onto damp kitchen towels. Let rest 24 hours before storing the jars in a cool place away from the light.

Makes 5 half-pint jars